Panda 3 WIP 5:
http://www.deviantart.com/deviation/57015845/
Still working on this one.
No smudging was done on any part of it.
http://www.deviantart.com/deviation/56797687/
Started long ago but then I stopped.
Finally finished it recently.
No smudging.
L. Spiro
More Art
Moderators: g3nuin3, SpeedWing, WhiteHat, mezzo
71 posts • Page 1 of 5 • 1, 2, 3, 4, 5
![]() by L. Spiro » Mon Jun 25, 2007 12:04 am
by L. Spiro » Mon Jun 25, 2007 12:04 am
Thank you. I have an update.
Panda 3 WIP 6:
http://www.deviantart.com/deviation/57910550/
Again still working on it and no smudging.
Raptor from when I was 12:
http://www.deviantart.com/deviation/58293084/
L. Spiro
Panda 3 WIP 6:
http://www.deviantart.com/deviation/57910550/
Again still working on it and no smudging.
Raptor from when I was 12:
http://www.deviantart.com/deviation/58293084/
L. Spiro
-
L. Spiro - L. Spiro
- Posts: 3129
- Joined: Mon Jul 17, 2006 10:14 pm
- Location: Tokyo, Japan

![]() by L. Spiro » Sun Nov 11, 2007 12:00 am
by L. Spiro » Sun Nov 11, 2007 12:00 am
Thank you.
And finally:
Panda 3
62 hours over 51 weeks, no smudging, raw pencil on paper.
And this is a preview of my next work:
 A Japanese model. This is just a test scan. The scan is really really too white; the scanner seems to have had a problem picking up the light details, just merging them into pure white instead. For example, that weird spot in the middle is her right eye, which is entirely outlined, but only the darker bits of it are showing here.
As for her left eye, the white of her eye is nowhere near that white on my paper. On my paper there is a clear definition between the white of the eye and the highlight on it. In the scanning, it all just looks white.
So I will go to a new place to have this scanned (all the way on the other God-damn side of Bangkok) next time. That was the point of doing this test.
The same problem appears in Panda 3 and I will get a new scan of that soon as well.
L. Spiro
And finally:
Panda 3
62 hours over 51 weeks, no smudging, raw pencil on paper.
And this is a preview of my next work:
A Japanese model. This is just a test scan. The scan is really really too white; the scanner seems to have had a problem picking up the light details, just merging them into pure white instead. For example, that weird spot in the middle is her right eye, which is entirely outlined, but only the darker bits of it are showing here.
As for her left eye, the white of her eye is nowhere near that white on my paper. On my paper there is a clear definition between the white of the eye and the highlight on it. In the scanning, it all just looks white.
So I will go to a new place to have this scanned (all the way on the other God-damn side of Bangkok) next time. That was the point of doing this test.
The same problem appears in Panda 3 and I will get a new scan of that soon as well.
L. Spiro
-
L. Spiro - L. Spiro
- Posts: 3129
- Joined: Mon Jul 17, 2006 10:14 pm
- Location: Tokyo, Japan
![]() by mezzo » Sun Nov 11, 2007 12:18 am
by mezzo » Sun Nov 11, 2007 12:18 am
I'm sure some black n white photographers wish their pictures looked like your drawings !! Looks like we have a veritable Michelangelo amongst us :p
- No thanks, I already have a penguin -
-

mezzo - El Mariachi
- Posts: 739
- Joined: Mon Apr 30, 2007 10:27 pm
- Location: Antwerp
![]() by Hash » Fri Dec 07, 2007 8:15 am
by Hash » Fri Dec 07, 2007 8:15 am
I recently visited this section of your forums, and your Panda 3 looks great!
Also, after viewing your pictures and sketches you've done, I see you as a completely different person.
I too am fascinated with sketching, and was wondering what kind of techniques you used to sketch Panda 3. (not to mention smudging, because you repeated so many times that you have not smudged)
Otherwise, all your arts are wonderful.
-Hash
-

Hash - Acker
- Posts: 88
- Joined: Thu Nov 08, 2007 12:24 pm
- Location: California, Los Angeles
![]() by L. Spiro » Fri Dec 07, 2007 12:08 pm
by L. Spiro » Fri Dec 07, 2007 12:08 pm
My style is fairly simple and straightforward: “Draw what I see”.
As I have not taken art classes or been taught by anyone else, I do not now many of the techniques used by others, and the ones I do know I choose to ignore simply because some people like to cheapen the result by saying, “Oh, he’s all techniques.”
That said, I can explain what I did and explain other techniques you may decide to use yourself.
For skin, layer-after-layer of soft cross-hatching. Building it up slowly and smoothly. In fact this applies to shading everywhere.
If you ue a dark pencil to shade a dark area, you get a very grainy texture that is not like the rest of your drawing. First lay down a solid layer of 4H or 2H. This changes the texture of the paper and makes it more suitable for the darker shades. Gradually use darker and darker pencils.
For highlights, well, simply don’t draw there.
Most people say to erase them out, but that doesn’t work—you lack control and precision with the eraser and in the end it never erases completely.
If you draw over the highlighted area a small bit it is okay; you can erase that out completely, but try to simply not draw over highlighted areas. This includes complex mixtures of highlights and shadows that make up hair.
As for hair, my own technique is the same as above. If a light strand crosses over darks, that is just how I draw it, rather than drawing all the darks and erasing the light strand across them. However you may opt to use other techniques to save time.
-> The indentation technique is not used by professionals and I advise against it, but here it is. Take a leadless pencil and draw dents into the paper where the light hairs are. Now you can draw over the dents and it will automatically leave white areas for you. This scars the paper and usually the result does not look natural.
-> I modified the above technique on my own, but in fact I don’t use my own technique either. With my technique, you draw the medium darkness of the hair, then put a piece of paper over the hair and draw onto that. When you draw onto that, it pushes down onto your drawing and removes the lead a little bit, helping you add highlights quickly without scarring your paper. Then you go in with the darks and you have some of the highlights there, so avoid drawing over them. Then you repeat the process of putting paper over your drawing. This adds more highlights to the darker areas. The highlights from the first pass should be standing out a lot more if you did not draw over them, mixed with the new highlights makes a more natural feel without scarring the paper.
The main technique I used is to simply go slowly. Take the time to draw every detail. That’s all that is needed to make any drawing better. The Panda 3 drawing took 62 hours.
The following Japanese Model preview was at 14 hours and it just had the two parts of the hat, the eye, the earring, and a shoulder not in the picture.
The grain of the skin was manually drawn in—a detail often overlooked but extremely helpful.
No detail is too small to add.
Also, focus heavily on the texture of whatever you are drawing. The textures are what really make them seem to jump off the paper.
L. Spiro
Last edited by L. Spiro on Sat Mar 08, 2008 2:14 pm, edited 1 time in total.
-
L. Spiro - L. Spiro
- Posts: 3129
- Joined: Mon Jul 17, 2006 10:14 pm
- Location: Tokyo, Japan
![]() by Hash » Sat Dec 08, 2007 6:07 am
by Hash » Sat Dec 08, 2007 6:07 am
Hey Spiro,
Thank you for the detailed description of your techniques; I especially like the technique of drawing your hair using lead removal with a paper - will try that with a portrait in the future.
Also when I decide to do human features, I end up having too much pencil marks instead of smooth, defiant tone. That's probably a problem with the way I use the pencil.
Personally, I like to draw objects and nature rather than human, as you said, texture is the main focus on portraits like these.
I'll take all your words into consideration.
By the way,
When you say "Drawn what I see" does that mean that Panda 3 was drawn based on a photograph?
thanks
-Hash
*Edit* I was browsing through the forums, and saw a picture of Panda.
Your sketch might have well been the original photograph.
-
Hash - Acker
- Posts: 88
- Joined: Thu Nov 08, 2007 12:24 pm
- Location: California, Los Angeles
![]() by varemenos » Sat Dec 22, 2007 8:11 pm
by varemenos » Sat Dec 22, 2007 8:11 pm
its time for my designs ^_^ i will edit this post soon to show you my signature work 
edit :
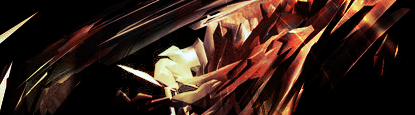
well here some of my designs i used to do for fun and to get better
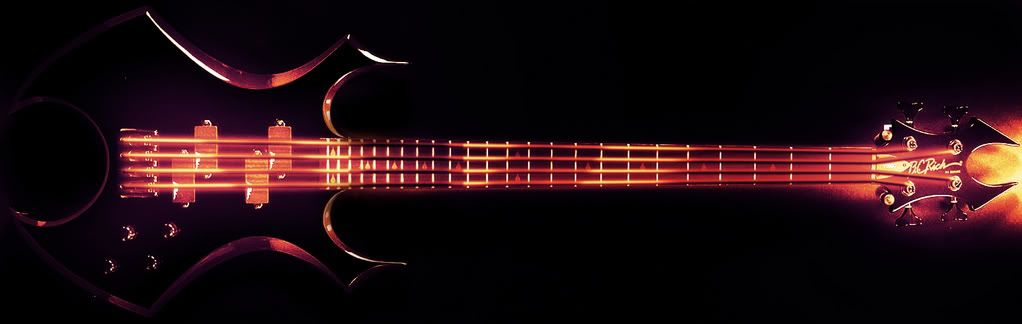
(i named it EvilGuitar even though its a base
maybe later i post how this used to be


^
i can give u a tutorial to try do a signature to look like this one ( but its a bit detailed and u need to know the "basics" of photoshop )

^
thats the hands of the Metallica vocalist

Iron Maiden gonna get you
edit :
well here some of my designs i used to do for fun and to get better
(i named it EvilGuitar even though its a base
maybe later i post how this used to be
^
i can give u a tutorial to try do a signature to look like this one ( but its a bit detailed and u need to know the "basics" of photoshop )
^
thats the hands of the Metallica vocalist
Iron Maiden gonna get you
Last edited by varemenos on Sat Dec 22, 2007 8:14 pm, edited 1 time in total.
-
varemenos - Been Around More
- Posts: 315
- Joined: Mon Dec 10, 2007 4:12 am
![]() by varemenos » Sat Dec 22, 2007 8:13 pm
by varemenos » Sat Dec 22, 2007 8:13 pm


^
this one is best of the best i ever designed T_T

^
simply save the fu.cking world or die with it

goal 2 a great movie :0
ok thats it enjoy ^_^
btw the latest artwork that i made are the one in my signature and this joke of the Mgame game
this one

-
varemenos - Been Around More
- Posts: 315
- Joined: Mon Dec 10, 2007 4:12 am
![]() by KarmaPixel » Sun Dec 23, 2007 4:22 am
by KarmaPixel » Sun Dec 23, 2007 4:22 am
I want to see some more sketch art's. It's been awhile since I sat w/pencil in hand and drew something for how it is. 
Have to retrain myself in shape's again then take it from there. I'm better at doing object's & landscape's though instead of people for some odd reason.
The 12 blue pencil's I used where for sketching and shading. The outline can be done with A normal pencil I think though.
Have to retrain myself in shape's again then take it from there. I'm better at doing object's & landscape's though instead of people for some odd reason.
The 12 blue pencil's I used where for sketching and shading. The outline can be done with A normal pencil I think though.
-

KarmaPixel - Hacker Smacker
- Posts: 42
- Joined: Thu Jul 20, 2006 6:51 am
![]() by L. Spiro » Sat Mar 08, 2008 2:20 pm
by L. Spiro » Sat Mar 08, 2008 2:20 pm

Here is an update on my next drawing. I put it down for about 4 months and didn’t draw anything but I had a girl over and she was interested so I explained how I drew all of my pictures and somehow it left me in the mood to draw when she left.
This is just a camera shot, not a scan, so it isn’t super-clear but the scan also had problems so I really just can’t win.
I hope to find a good way to get an image of this online by the time it is done since it is wasted effort if I can not (I personally do not care to look at my art, so if others are not looking then no one is).
This is the only place where I will upload this image so enjoy, and I will answer any questions regarding my style or techniques.
L. Spiro
Last edited by L. Spiro on Sun Mar 09, 2008 6:46 pm, edited 1 time in total.
-
L. Spiro - L. Spiro
- Posts: 3129
- Joined: Mon Jul 17, 2006 10:14 pm
- Location: Tokyo, Japan
71 posts • Page 1 of 5 • 1, 2, 3, 4, 5
Who is online
Users browsing this forum: No registered users and 0 guests